Key Takeaways
-
Choosing the right gear is essential for high-quality wildlife videos.
-
Understanding animal behavior and patterns increases your chances of capturing compelling footage.
-
Patience and positioning are key: being invisible and waiting for the perfect moment can make all the difference.
-
Proper video stabilization and focus techniques are crucial for sharp, clear wildlife imagery.
-
Editing your wildlife videos can enhance the story and highlight the beauty of the natural world.
Capturing the Wild: A Guide to Exceptional Wildlife Videography
When the wilderness calls, there’s nothing quite like the thrill of capturing its inhabitants on video. Whether you’re a budding videographer or a seasoned pro, the art of wildlife videography is one that can always be refined. Let’s dive into the world of wildlife video shooting, where patience meets passion and every shot tells a story.
Understanding the Basics of Wildlife Videography
Before you venture out into the wild, it’s important to grasp the basics. Wildlife videography isn’t just about pressing the record button; it’s about storytelling. It’s about creating a visual narrative that connects the audience to the natural world. To do this, you’ll need to understand not only your equipment but also the environment and the behavior of the animals you wish to capture.
Essential Gear for Budding Wildlife Videographers
First things first, you’ll need the right gear. A DSLR or mirrorless camera with video capability is a great place to start. Look for features like high frame rates for smooth motion and a good autofocus system to keep up with fast-moving subjects. Remember, it’s not just about the camera; the lenses, tripod, and other accessories play a pivotal role too.
Techniques to Master for the Perfect Shot
To get that perfect shot, you’ll need to master a few techniques. This includes understanding the rule of thirds for composition, learning how to manually focus for sharp images, and knowing how to use light to your advantage. All these skills combined will elevate your wildlife videos from ordinary to extraordinary.
Most importantly, it’s about knowing when to hit record. Sometimes, the difference between a good video and a great one is a matter of seconds. Always be ready.
Fine-Tuning Your Wildlife Videos with Editing
Once you’ve captured your footage, the journey isn’t over. Editing is where you bring your story to life. It’s not just about cutting clips; it’s about pacing, color correction, and adding elements like music or voiceovers that complement the visual experience. Editing is where you refine your vision and share it with the world.
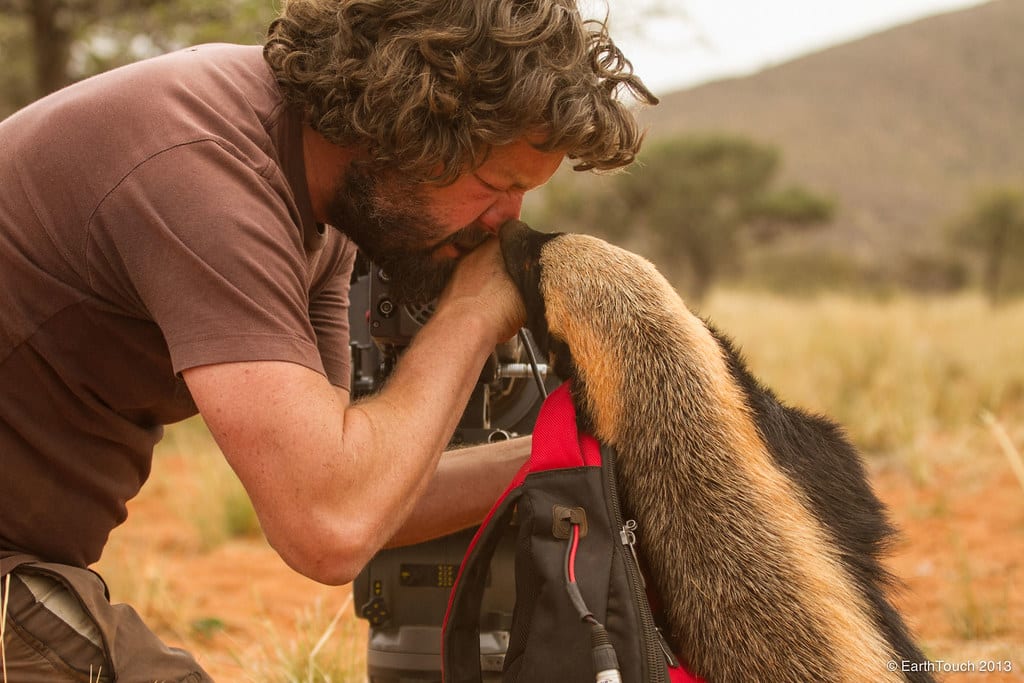
“Earth Touch cameraman Boris von Schoe …” from www.flickr.com and used with no modifications.
Let’s Gear Up: Choosing the Right Equipment
Now, let’s talk about gear. The right equipment is the cornerstone of wildlife videography. It’s the difference between a shaky, blurry mess and a crisp, engaging masterpiece. Here’s what you need to know to gear up for success. For those interested in taking their wildlife videography to the next level, consider the Zhiyun Crane 3 stabilizer for smooth, professional shots.
Finding the Ideal Camera for Wildlife Adventures
When choosing a camera, consider factors like sensor size, frame rate, and battery life. A full-frame sensor is great for low light conditions, and a high frame rate will allow you to slow down fast action in post-production. Also, make sure your camera has a robust battery life or bring extra batteries—you don’t want to miss a rare sighting because you ran out of power.
Lenses That Bring Nature Closer
The right lens can make all the difference. A telephoto lens is a must-have for wildlife videography; it allows you to capture close-ups without disturbing your subject. Look for lenses with image stabilization and fast autofocus to keep your footage sharp and in focus.
Stabilizing Your Shots: Tripods and Gimbals
A shaky camera can ruin an otherwise perfect video. That’s why stabilization is key. A sturdy tripod is essential for stationary shots, while a gimbal can help stabilize footage when you’re on the move. Remember, smooth footage not only looks better, but it also helps convey a sense of professionalism.
Investing in a quality tripod and learning how to use a gimbal properly will set your wildlife videos apart.
Accessorize for Success: Filters, Batteries, and More
Accessories can enhance your shooting experience and improve your footage. Lens filters, for example, can help manage light and protect your lens. Extra batteries are a must, and memory cards with fast write speeds will ensure you can keep recording those high-resolution videos without interruption.
Audio Considerations: Capturing the Sounds of the Wild
Besides that, let’s not forget about audio. The sounds of the wild can be just as captivating as the visuals. A directional microphone will help you capture the calls and songs of wildlife, adding another layer to your videos. Good audio can transport your audience right into the scene, making the experience more immersive.
Now that you’re familiar with the basics and the gear, it’s time to move on to the more nuanced aspects of wildlife videography. Stay tuned for the next section, where we’ll explore how to position yourself in the wild, the importance of patience, and advanced shooting techniques to capture the essence of nature’s most elusive creatures.
Blending In: How to Minimize Your Presence
When you’re out in the wild, ready to shoot, remember: you’re a guest in the animal’s home. Blending in is crucial. Wear neutral colors, move slowly and quietly, and avoid strong scents. Your goal is to observe without altering the behavior of your subjects. If you can achieve this, you’re on your way to capturing wildlife videos that are both authentic and respectful to the natural world.
Timing Is Everything: The Virtue of Patience
Patience is not just a virtue; it’s a necessity in wildlife videography. Animals won’t perform on cue, so you must be willing to wait. Sometimes, you’ll spend hours or even days waiting for the perfect moment. It’s in these moments of stillness that nature often reveals its most intimate scenes. So, settle in, stay vigilant, and be ready to capture the action when it unfolds.
Sharpening Your Focus: Shooting Techniques
Getting your focus right is a game-changer in wildlife videography. Unlike other genres, you can’t ask a wild animal to ‘go back’ and do it again. You often have only one chance to get the shot. Therefore, understanding your camera’s focus system is key. Use back-button focusing for better control, and practice panning smoothly with moving subjects to keep them sharp.
Composition is another vital aspect. The rule of thirds is your friend here, helping to create visually appealing and balanced footage. Remember to leave space in the direction the animal is looking or moving—it adds to the sense of motion and life in your videos.
Lastly, don’t forget the importance of a clean background. A cluttered background can distract from your subject. Aim for simplicity where possible, allowing the viewer’s focus to remain on the wildlife.
Getting to Know Your Subject
Knowledge of your subject’s behavior is a powerful tool. By understanding the habits and patterns of the wildlife you’re filming, you can anticipate actions and be ready to capture those fleeting moments. This might mean knowing when a bird is about to take flight or when a predator is on the hunt. Study your subject, learn its behavior, and your footage will be all the richer for it.
For example, if you’re filming deer, observe them from a distance to understand their grazing and alertness patterns. This can give you clues about how to position yourself and when to expect moments of interest, like a buck defending its territory.
Mastering Manual Focus for Dynamic Subjects
Autofocus is great, but there are times when manual focus becomes essential. When an animal is moving through complex environments, like a dense forest, autofocus can get confused. That’s when your manual focus skills come into play. Practice pulling focus smoothly to keep your subject sharp as it moves.
To aid in this, consider using focus peaking if your camera supports it, or zoom in digitally to check focus before recording. This can be especially helpful when dealing with small or distant subjects.
-
Practice focusing on moving objects at different speeds and distances.
-
Use your camera’s focus assist features to ensure sharpness.
-
Stay calm and adjust focus slowly to avoid abrupt changes in your video.
Remember, smooth transitions in focus can add a professional touch to your wildlife videos.
Understanding Light and Exposure in Natural Environments
Lighting in the wild is unpredictable, and mastering exposure is key to capturing the beauty of wildlife. The golden hours—shortly after sunrise and before sunset—provide the most flattering light. But don’t shy away from cloudy days; the diffused light can minimize harsh shadows and highlight details in your subject’s fur or feathers.
An example to remember: filming an eagle against a bright sky can be challenging. To avoid silhouetting, adjust your exposure to highlight the eagle’s details, even if it means the sky is overexposed.
Use manual exposure settings to adjust to changing light conditions swiftly. And consider carrying a variable ND filter to manage exposure without compromising your desired aperture and shutter speed.
When you’re in the field, constantly monitor the light and be ready to adjust your settings. Exposure compensation can be your best friend in tricky lighting situations.
Bringing Your Footage to Life: Editing Essentials
Once you’ve captured the wonders of the wild, it’s time to bring your footage to life. Editing is where you tell the story. It’s not just about stringing clips together; it’s about pacing, narrative, and emotion. Here’s how to make the most of your wildlife footage in post-production.
Choosing the Right Software for Wildlife Video Editing
There’s a plethora of video editing software out there, from beginner-friendly options like iMovie and Adobe Premiere Elements to professional-grade choices like Final Cut Pro and Adobe Premiere Pro. When selecting software, consider your skill level, the complexity of your projects, and your budget.
For those just starting, user-friendly interfaces and built-in tutorials can be incredibly helpful. As you advance, you may appreciate more sophisticated features like color grading tools and motion tracking.
Most importantly, choose software that feels intuitive to you. The less you have to fight with your tools, the more you can focus on crafting your story.
-
Adobe Premiere Pro: Versatile and widely used with extensive features.
-
Final Cut Pro: Streamlined for Mac users with powerful editing capabilities.
-
Davinci Resolve: Strong color correction and grading tools for a cinematic look.
Color Correction Tips for Natural Vibrance
Color correction is essential to ensure your wildlife videos look natural and vibrant. Start by setting the correct white balance to ensure colors are true to life. Then, adjust exposure, contrast, and saturation to enhance the image without making it look artificial.
Remember, the goal is to reflect the true beauty of the wildlife and their environment. Subtlety is key—avoid over-saturating colors or crushing blacks to the point where detail is lost.
Cutting and Sequencing: Telling a Compelling Story
The way you cut and sequence your footage can transform a series of clips into a compelling narrative. Start with a strong opening shot to grab attention, then sequence your clips to build interest and tell a story. Pay attention to pacing—mixing longer, contemplative shots with shorter, action-packed ones can keep viewers engaged.
Also, consider the power of sound. Natural ambient sounds can greatly enhance the immersion of your video, while a well-chosen soundtrack can underscore the emotional tone.
-
Start with your strongest footage to captivate your audience from the get-go.
-
Use a mix of wide, medium, and close-up shots for variety.
-
Match cuts to the rhythm of the natural sounds or music for a cohesive feel.
Through thoughtful editing, you can share your wildlife encounters in a way that resonates with viewers and honors the natural world.
Sharing with the World: Final Touches and Distribution
Creating the video is only part of the journey. Sharing your work with the world is where the true impact happens. It’s about finding the right platform and format to showcase your wildlife stories. But most importantly, it’s about connecting with an audience that shares your passion for the natural world.
Crafting a Narrative: Adding Voiceovers or Music
A compelling narrative can elevate your wildlife video from a mere collection of clips to a story that captivates and educates. Adding a voiceover can provide context and share insights about the species or habitat you’re showcasing. When selecting music, choose pieces that complement the pace and mood of your footage without overpowering the natural sounds that are integral to the experience.
Video Formats and Platforms for Optimal Viewing
Choosing the right format is crucial for ensuring your video looks its best on any platform. High definition (HD) is a must, and 4K resolution is becoming increasingly popular for its stunning detail. Consider the platform where you’ll be sharing your video—whether it’s YouTube, Vimeo, or a personal blog—and optimize your export settings for that medium.
Engaging Your Audience and Building a Following
Building a following takes time and engagement. Share your videos on social media, participate in wildlife and videography forums, and collaborate with other enthusiasts. Engage with your viewers by responding to comments and asking for feedback. The more you interact with your audience, the more you’ll understand what resonates with them, helping you to refine your future projects.
Frequently Asked Questions (FAQ)
Let’s address some common questions that budding wildlife videographers might have. These answers will give you additional insights into the world of wildlife videography and help you navigate some of the challenges you might face.
What is the best time of day to shoot wildlife videos?
The golden hours, just after sunrise and before sunset, offer the best natural lighting for wildlife videos. However, the best time also depends on the behavior of the animals you’re filming. Some species are more active at dawn, dusk, or even at night, so research your subject to determine the optimal time to film.
How do I approach animals without disturbing them?
Approach animals slowly and quietly, keeping a respectful distance. Use a long lens to get close-up shots without physically getting too close. Always prioritize the well-being of the wildlife and their habitat over getting the shot.
Can I use my smartphone to shoot wildlife videos?
Yes, smartphones can be used to shoot wildlife videos, especially newer models with advanced camera systems. While they may not offer the same quality as DSLR or mirrorless cameras, they’re a great option for beginners or for capturing unexpected moments when you don’t have your primary equipment on hand.
How do I avoid camera shake when filming without a tripod?
To minimize camera shake, use your body as a stabilizer by tucking your elbows into your sides or lying down for support. You can also lean against a tree or rest your camera on a steady surface. Additionally, use the image stabilization feature on your camera or lens if available.
What are some legal considerations when shooting wildlife videos?
Always research and follow local wildlife laws and regulations. Obtain the necessary permits for filming in protected areas, and respect rules regarding drone usage. Remember, the welfare of the wildlife and their environment should always come first.