Article-at-a-Glance
- Understanding the difference between natural and artificial lighting for pet videos.
- Positioning your pet to take advantage of the best light sources.
- Using reflectors and diffusers to enhance your pet’s on-camera appearance.
- Tackling common challenges like shadows and glare in indoor and outdoor settings.
- Essential gear recommendations for both beginners and pros in pet videography.
The Key to Paw-some Pet Videos
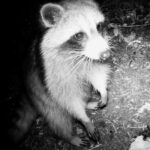
Have you ever noticed how some pet videos just seem to sparkle with life and energy? The secret ingredient is often the lighting. It’s not just about seeing your pet; it’s about showcasing their unique personality and creating a mood that resonates with viewers. Whether you’re capturing your cat’s lazy afternoon yawns or your dog’s high-energy frisbee catch, the right lighting can make all the difference.
Why Lighting Matters in Pet Videography
Lighting in pet videography isn’t just about visibility; it’s about emotion, clarity, and vibrancy. Good lighting can highlight your pet’s best features, add depth to their fur, and bring out the sparkle in their eyes. It can also help avoid common issues like red-eye or grainy footage, which can detract from the charm of your video.
Illuminating the Basics
Understanding Natural vs. Artificial Light
When it comes to lighting for pet videos, you have two main choices: natural and artificial light. Natural light, provided by the sun, is often the go-to choice for its softness and beauty. However, it can be unpredictable and isn’t always available. Artificial light, on the other hand, offers control and consistency. Whether you’re working with basic household lamps or professional studio lights, knowing how to manipulate artificial light is key.
Positioning Your Pet for the Perfect Shot
The angle and position of your pet in relation to the light source can dramatically affect the outcome of your video. Here are a few pointers:
For more tips on capturing your pet’s best moments, check out our guide on capturing superb pet action video.
- For a soft, natural look, place your pet near a window where diffused sunlight can gently illuminate their features.
- If you’re using artificial light, avoid placing it directly above or below your pet, as this can create harsh shadows.
- Consider the time of day when using natural light; the golden hour, just after sunrise or before sunset, can provide a warm, glowing backdrop.
Most importantly, observe how the light interacts with your pet’s fur and eyes. Adjust their position until you find that sweet spot where the lighting complements their natural beauty.
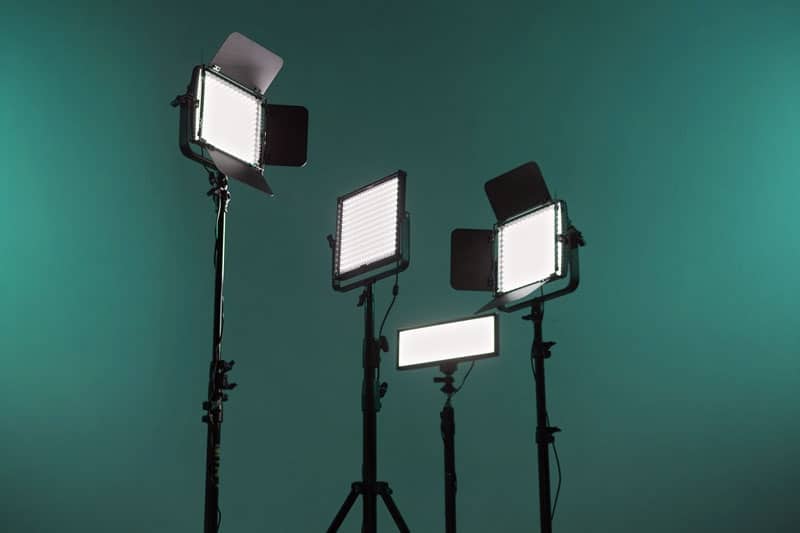
Selecting the Right Equipment
Choosing the right lighting equipment is like picking the perfect collar for your pet—it should be a good fit for their needs and your capabilities. Let’s dive into the gear that will help you shine a light on your pet’s star qualities.
Essential Gear for Pet Video Enthusiasts
Getting started doesn’t have to break the bank. Begin with what you have, even if it’s just the sunlight and a smartphone. But if you’re ready to step up your game, consider these essentials:
- A basic LED panel or ring light for a steady, adjustable source of light.
- Reflectors to bounce light onto your pet, filling in shadows for a more flattering look.
- Diffusers to soften the light and prevent harsh glares on your pet’s coat.
From DIY Solutions to Professional Setups
DIY solutions can be surprisingly effective. A white sheet can serve as a diffuser, and aluminum foil can work as a makeshift reflector. However, for more control and quality, professional gear like softboxes and studio strobes might be the next step in your pet videography journey.
Remember, the goal is to highlight your pet’s features without making them uncomfortable. Therefore, start with the basics and gradually build up your equipment as you and your pet get more accustomed to the process.
Set the Scene: Lighting Setups for Various Moods
“Snuggle Time” Warm Lighting Arrangement
For those cozy moments when your pet is curled up and dozing, warm lighting can enhance the feeling of comfort. Position a soft light source to the side of your pet, creating a gentle shadow and a sense of depth. A warm-toned LED can mimic the relaxing ambience of sunset.
Here’s a simple setup to try:
- One warm-toned LED panel placed at a 45-degree angle from your pet.
- A reflector on the opposite side to catch and bounce back the light, softening shadows.
For example, when my golden retriever, Sunny, settles in for her evening nap, I use a warm LED light to the side and a reflector opposite to it. The result is a video that looks like it’s bathed in golden hour light, perfect for sharing with friends and family who can’t get enough of her adorable moments.
“Action Adventures” Bright and Dynamic Configurations
For the playful times when your pet is full of energy, you’ll want a lighting setup that can keep up with the action. A bright, even light ensures that every leap and bound is captured in detail.
Consider this dynamic setup:
- Two daylight-balanced LED panels, one on each side of the action area, to minimize shadows and provide even coverage.
- A backlight behind your pet to help them stand out from the background and add a sense of movement.
With this setup, you’ll capture every detail of your pet’s playful antics, whether they’re chasing their tail or jumping through hoops.
Lights, Camera, Barktion: Tips and Tricks for a Smooth Shoot
Now that we’ve got our lighting dialed in, it’s time to focus on the star of the show: your pet. A successful shoot is about more than just technical setup; it’s about creating an environment where your pet can shine.
Training Your Pet for the Camera
Training your pet to be comfortable in front of the camera is crucial. Start with short sessions and lots of treats. Use positive reinforcement to associate the camera and lights with a fun experience. Patience is key, and remember, every pet has its own pace.
Quick Adjustments for Moving Subjects
Pets rarely stay still, so be prepared to make quick adjustments. If you’re using a smartphone, take advantage of features like autofocus and exposure lock. For more advanced cameras, set a higher shutter speed to freeze the action.
Always keep an eye on the light and your pet’s position within it. If they move out of the ideal lighting zone, gently guide them back or adjust your lights accordingly.
Watch and Learn: KEA Productions on Capturing Action
For those looking to dive deeper into the art of pet videography, there’s no better place to turn than the experts. KEA Productions, known for their incredible animal videos, offers a wealth of knowledge and inspiration.
Meet “The Key” in KEA Productions
At the heart of KEA Productions is their “AVP” or Animal Video Pro, a master at capturing pets in their best light. By observing their techniques, you can learn how to bring out the energy and personality of your pet in every frame.
Discover Advanced Animal Video Techniques
If you’re eager to learn more and take your pet videos to the next level, visit KEA Productions and check out their pet project, PetsCango.com. Explore their site to gain insights into professional animal videography and find out how you can apply these techniques to your own furry friend’s videos (both domestic and wild).
Meet “The Key” in KEA Productions
When it comes to pet videography, there’s a name that stands out: KEA Productions. They’ve carved a niche in capturing the essence of our animal companions on camera. It’s not just about pointing a lens at your pet; it’s about understanding their behavior, predicting their movements, and being ready to catch that magic moment in the perfect light.
At KEA Productions, the “AVP” or Animal Video Pro, isn’t just a title—it’s a testament to the dedication and skill required to produce stunning, high-quality pet videos. This is where technical expertise meets a deep love for animals, resulting in videos that tell a story and touch hearts.
Discover Advanced Animal Video Techniques
There’s always more to learn in the ever-evolving field of pet videography. For those who are ready to take their skills further, exploring advanced techniques is the next step. KEA Productions offers insights that could transform the way you approach pet videos. From lighting setups to capturing action-packed sequences, they’ve got the expertise you need.
By learning from their experiences, you can enhance your own pet videography, ensuring that every video you make is not just seen but felt. Whether you’re a seasoned pro or just starting out, their tips and tricks are invaluable. Click the link above to delve into the world of professional pet video production and bring your pet’s personality to life on screen.
Frequently Asked Questions (FAQ)
How do I avoid red-eye in my pet’s videos?
To prevent red-eye in pet videos, position your light source above and to the side of your camera, not directly behind it. This angle reduces the chances of light reflecting directly off your pet’s eyes into the lens. If you’re using a flash, a diffuser can also help soften the light and minimize red-eye.
Can I use smartphone lighting accessories for pet videos?
Absolutely! Smartphone lighting accessories like clip-on LED lights and portable ring lights can greatly improve the quality of your pet videos. They provide additional light that can help illuminate your pet’s features, especially in low-light conditions. Just make sure to use them in a way that doesn’t startle or discomfort your pet.
What are the best lighting conditions for outdoor pet videos?
The golden hour—shortly after sunrise or before sunset—is widely regarded as the best time for outdoor pet videos. The light is softer and warmer, giving your pet a beautiful glow. Overcast days can also provide excellent lighting conditions by diffusing sunlight and eliminating harsh shadows.
How do I create a dramatic effect with lighting in pet videos?
To create drama, play with contrasts and shadows. A single light source can cast dramatic shadows, highlighting your pet’s movements and features. Backlighting your pet can create a silhouette effect, adding an element of mystery or emphasizing their outline against a brighter background.
Is continuous lighting or flash better for pet videography?
Continuous lighting is generally better for pet videos as it allows you to see the effect of the light in real-time and adjust accordingly. It’s also less likely to startle your pet compared to the sudden burst of a flash. However, for high-speed action shots, a flash can freeze the moment, capturing sharp details that continuous light might miss.
When filming or photographing your pet, lighting is crucial to capture their best features and expressions. Whether you’re using three-point lighting for a dynamic effect, harnessing the soft glow of natural light, or setting up butterfly lighting to emphasize their adorable face, the right lighting can make all the difference. Experiment with different techniques to find what best showcases your pet’s unique personality.